

Prerequisites: You need an active Cashfree account to use the mobile dashboard. If you don’t have an account, sign up for a Cashfree account before downloading the app.
Getting started
Download the app from the following locations:iOS on App Store
iOS on App Store
Scan this QR code with your iPhone or iPad camera to download the app directly from the App Store. Download Link: Cashfree Business App
Android on Google Play Store
Android on Google Play Store
Scan this QR code with your Android device camera to download the app directly from Google Play Store. Download Link: Cashfree Business App
- Sign in with your registered email address and password.
- If you don’t have a Cashfree account, sign up for a Cashfree account.
- (Optional) Enable biometric authentication from your profile settings for added convenience and security.
For enhanced security, enable biometric authentication (fingerprint or face recognition) after your initial login.
Key features
The Cashfree Mobile Dashboard includes the following features:Monitor business performance
The Home screen provides a quick glimpse of key business metrics through charts and summaries that help you monitor your financial performance at a glance.Home screen
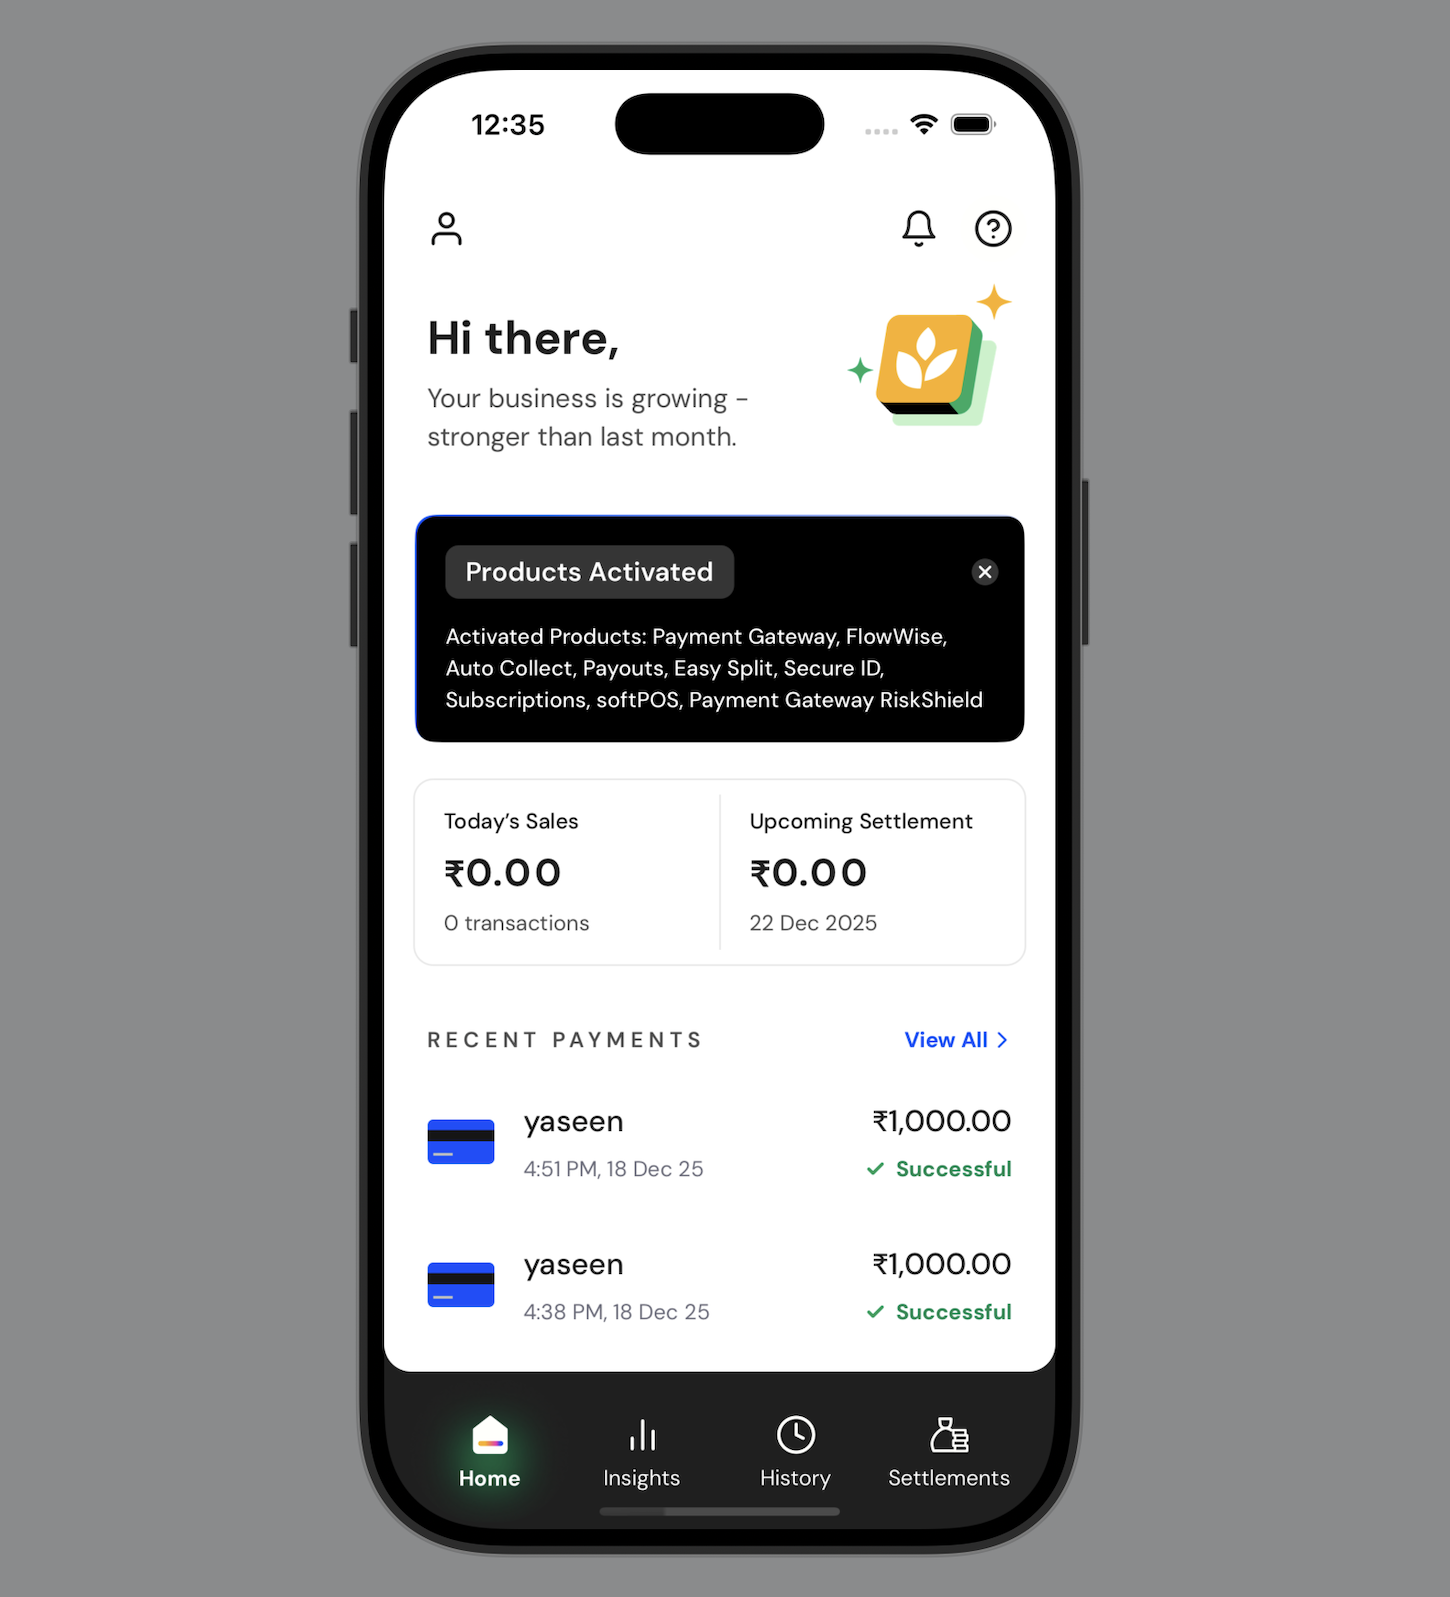
View sales data, settlements, recent payments, and quick actions
Manage payments
Create payment links and share payment handles directly from the Home screen.Create a payment link
Create payment links to request payments from your customers. Share the link via SMS or email, and customers can complete transactions securely. To create a payment link:- On the Home screen, select Create Payment Link.
- On the Create Payment Link screen, select the currency from the dropdown list, and then enter the payment amount.
- Under Payment Description, enter a description that explains what the payment is for. This description appears to the customer.
- Under Phone Number, select the country code from the dropdown list, and then enter the customer’s phone number.
- Optionally add:
- Customer’s name under Name.
- Customer’s email address under Email Address.
- Expand Additional Options to configure settings such as:
- Send Payment Link: Select SMS or Email to send the payment link to the customer.
- Allow Partial Payments: Enable customers to make partial payments against the total amount.
- Minimum Amount: If you allow partial payments, enter the minimum amount that customers can pay.
- Set Link Validity: Select the expiry date and time for the payment link.
- Link ID: Enter a unique identifier for the payment link.
- Add Notes: Enter any additional notes or instructions for your reference.
- Select Create to generate the payment link.
Share a payment handle
Share your unique payment handle with customers to accept payments. To share a payment handle:- On the Home screen, select Share Payment Handle.
- Select Preview to view the payment handle before sharing.
- Select Copy or Share Now.
- Select your preferred sharing method, and then share the payment handle.
Analyse business insights
The Insights screen provides detailed business performance analysis, tracking, and comparison across different time periods. Access comprehensive business metrics and performance data with advanced filtering and comparison options. Each insight displays a View all option for additional detailed information.Insights screen
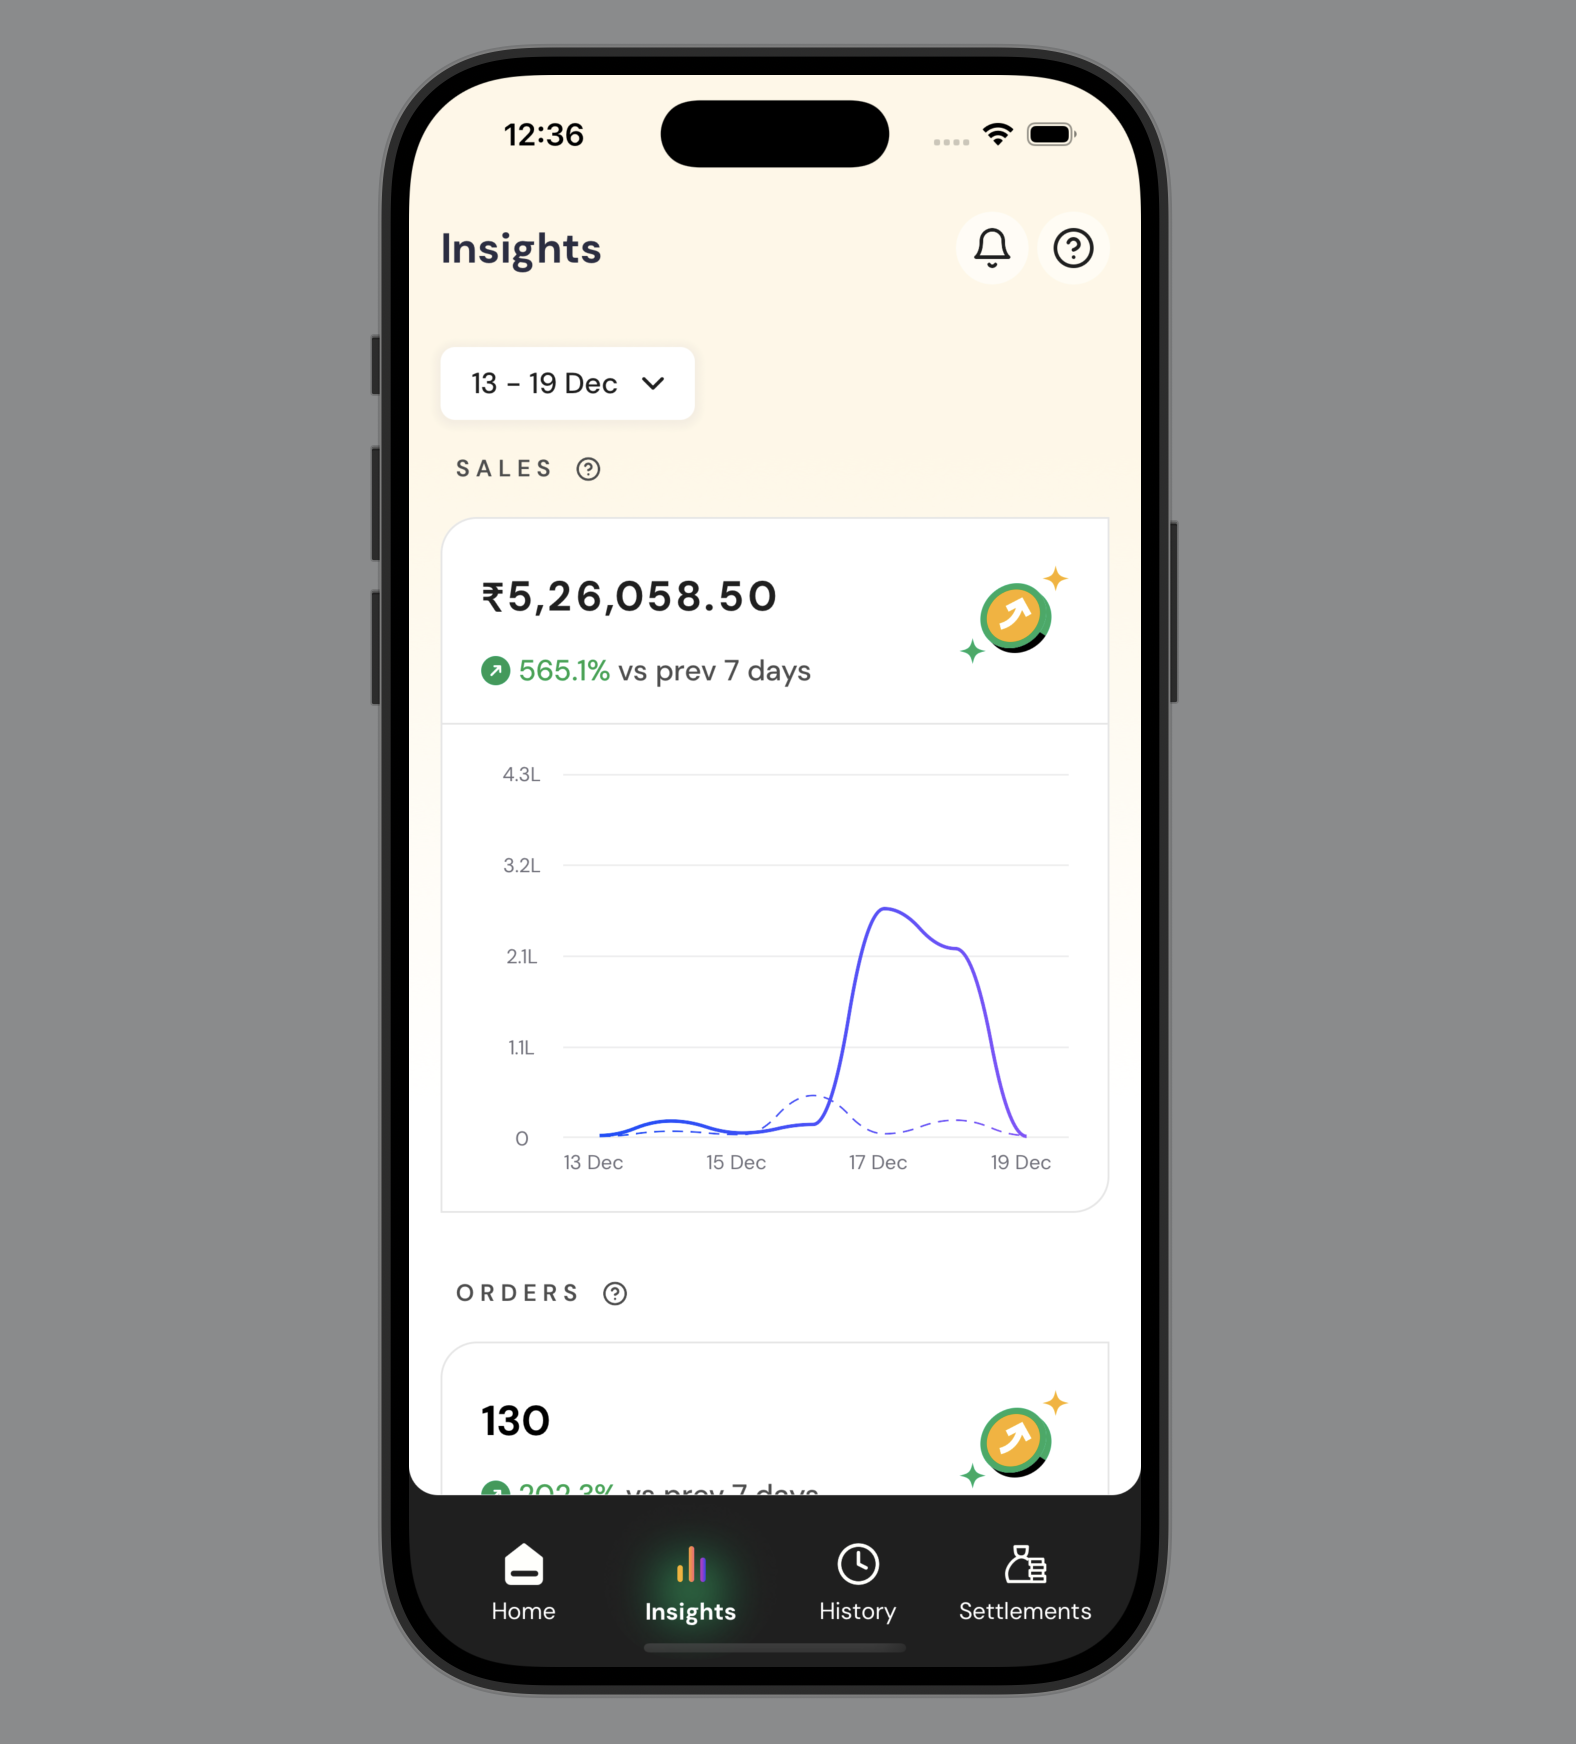
Analytics for sales, orders, customers, geography, and payment methods
View transaction history
Use the History tab to view and manage all transaction-related activities within your account. Access detailed information about payments, orders, disputes, and refunds, and use search and filter capabilities to locate specific transactions.Transaction screen
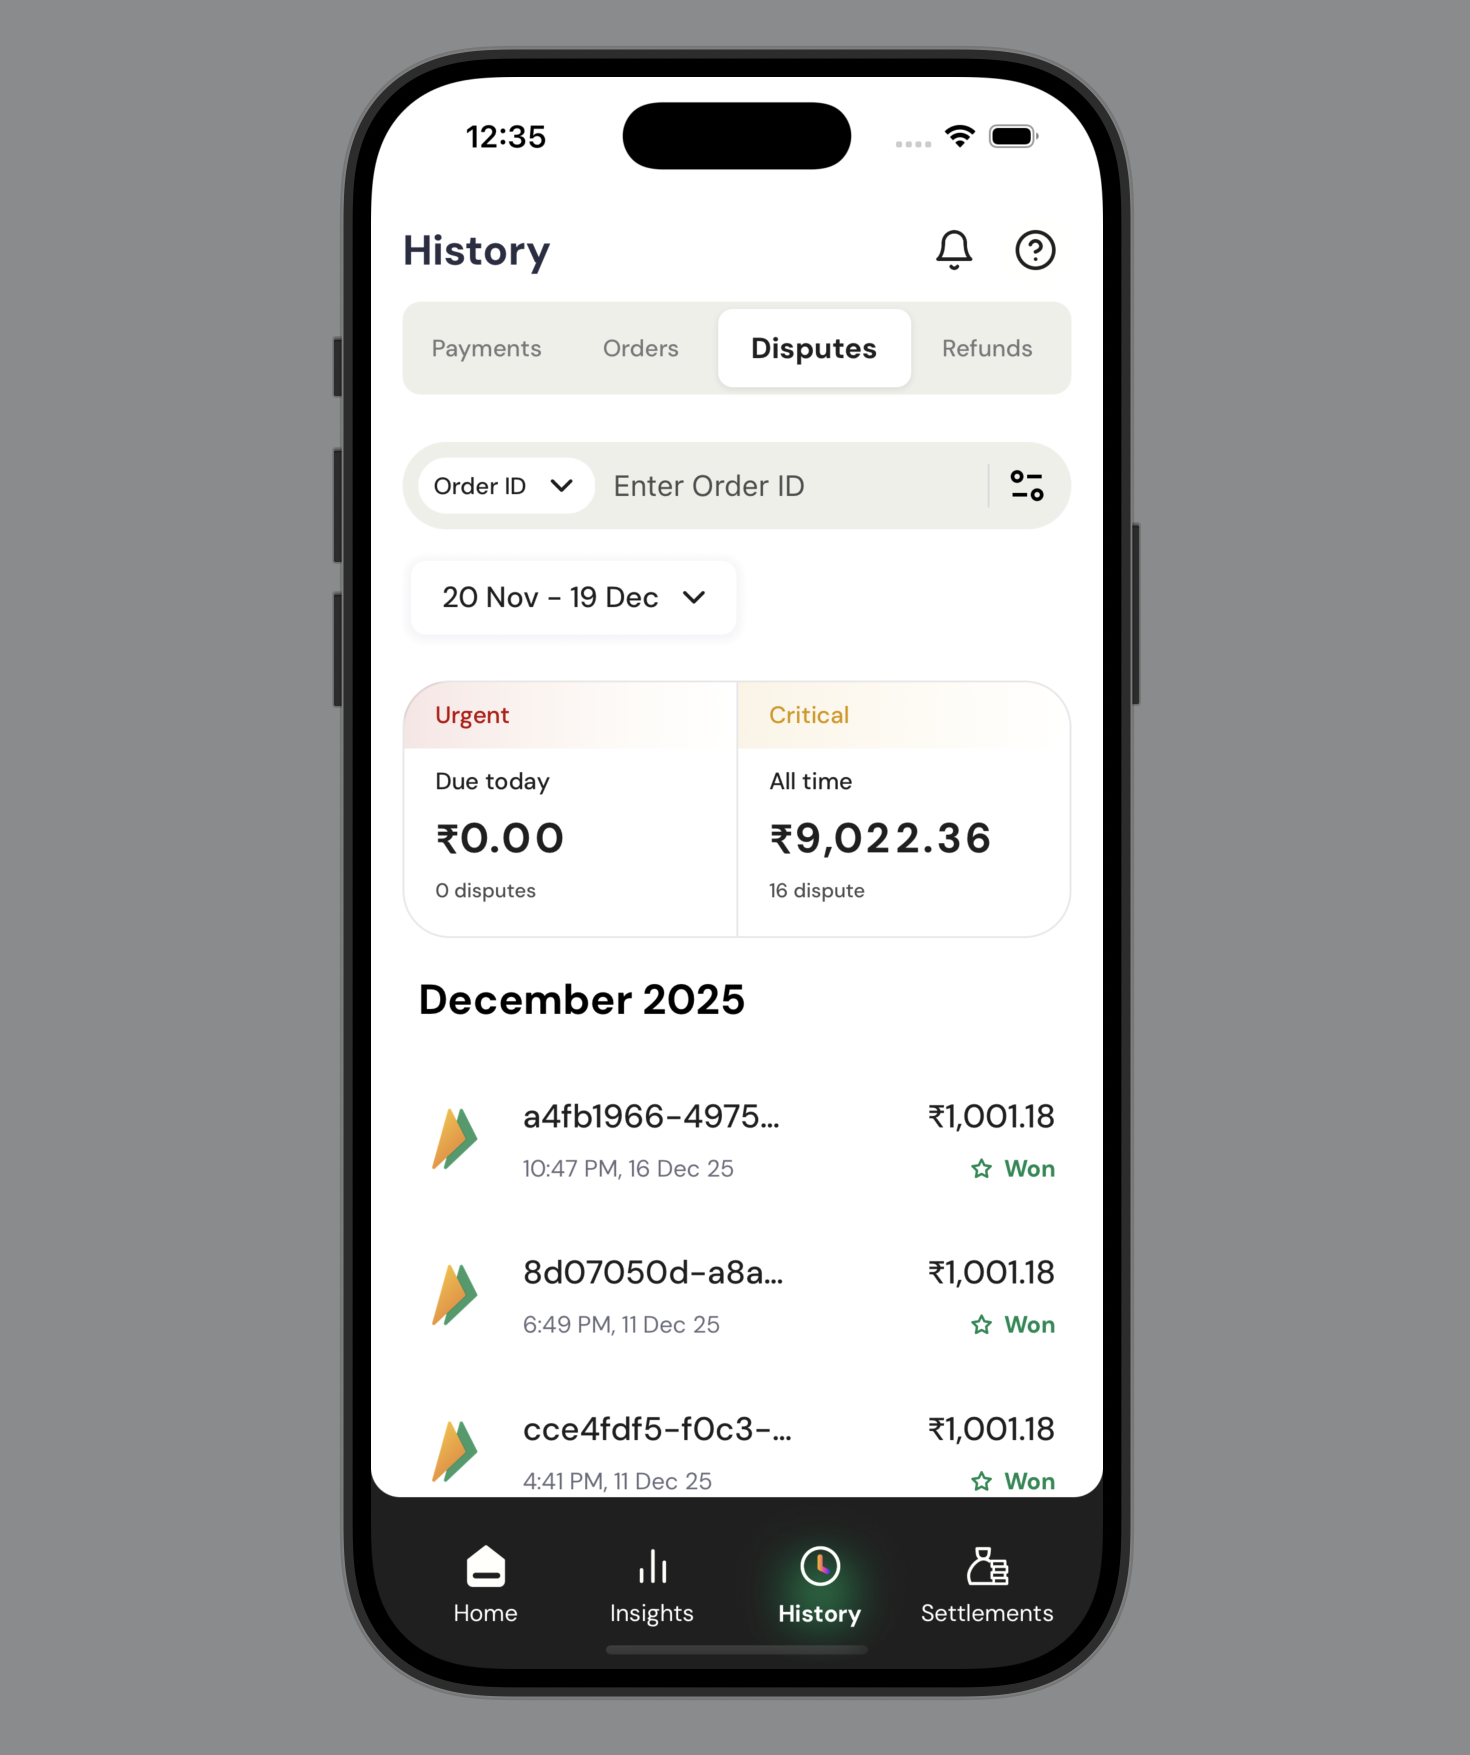
Manage payments, orders, disputes, and refunds with search and filters
Manage disputes
Take action on payment disputes directly from the History tab when disputes require your response. To contest a dispute and submit evidence:- On the History tab, select Disputes.
- Select the dispute that shows “Action required” status.
- Review the dispute details including dispute ID, reason, transaction amount, and dispute type.
- Select Take Actions to respond to the dispute.
- On the response screen, choose your action:
- Accept dispute: Accept the dispute without contesting
- Contest dispute and submit evidence: Challenge the dispute with supporting documentation
- If contesting, upload relevant evidence documents:
- Delivery/Service Proof: Documentation showing successful delivery or service completion
- Cancellation of Service Proof: Evidence of service cancellation or modification
- Refund Proof: Documentation of refunds processed to the customer
- Extra Charges Declaration: Justification for additional charges applied
- Select Submit Evidence to complete your response.
Supported file formats for evidence: JPG, JPEG, PNG, PDF. Maximum file size: 20 MB per document.
Initiate refunds
Initiate refunds for successful payment transactions directly from the History tab. The refund process provides detailed transaction information and allows you to process full or partial refunds with optional notes. To process a refund:- On the History tab, select Payments.
- Select the successful payment transaction you want to refund.
- Review the transaction details including:
- Transaction ID and amount
- Customer details (phone number and IP address)
- Payment timeline with creation and success timestamps
- Select Initiate Refund at the bottom of the transaction details screen.
- Review the refund information:
- Processing time: 2-3 business days
- Eligible refund amount: Maximum amount available for refund
- Configure the refund details:
- Currency: Confirm the refund currency (automatically set to transaction currency)
- Amount: Enter the refund amount (partial or full amount up to the eligible limit)
- Add note: Optionally provide a reason or note for the refund
- Select Initiate Refund to confirm and process the refund request.
Refund processing times are typically 2-3 business days. The eligible refund amount may be less than the original transaction amount if partial refunds have already been processed.
- Select the appropriate category tab.
- Select the search field dropdown to choose your search criteria.
- Enter the search value in the text field. Results display automatically as you type.
- In the upper-right corner, select the filter icon.
- Select one or more status options.
- Select Apply filters.
Available filter options vary by transaction category.
Manage settlements
Use the Settlements tab to track and manage fund transfers to your bank account. View settlement schedules, monitor processing status, and initiate on-demand withdrawals when needed.Settlement screen
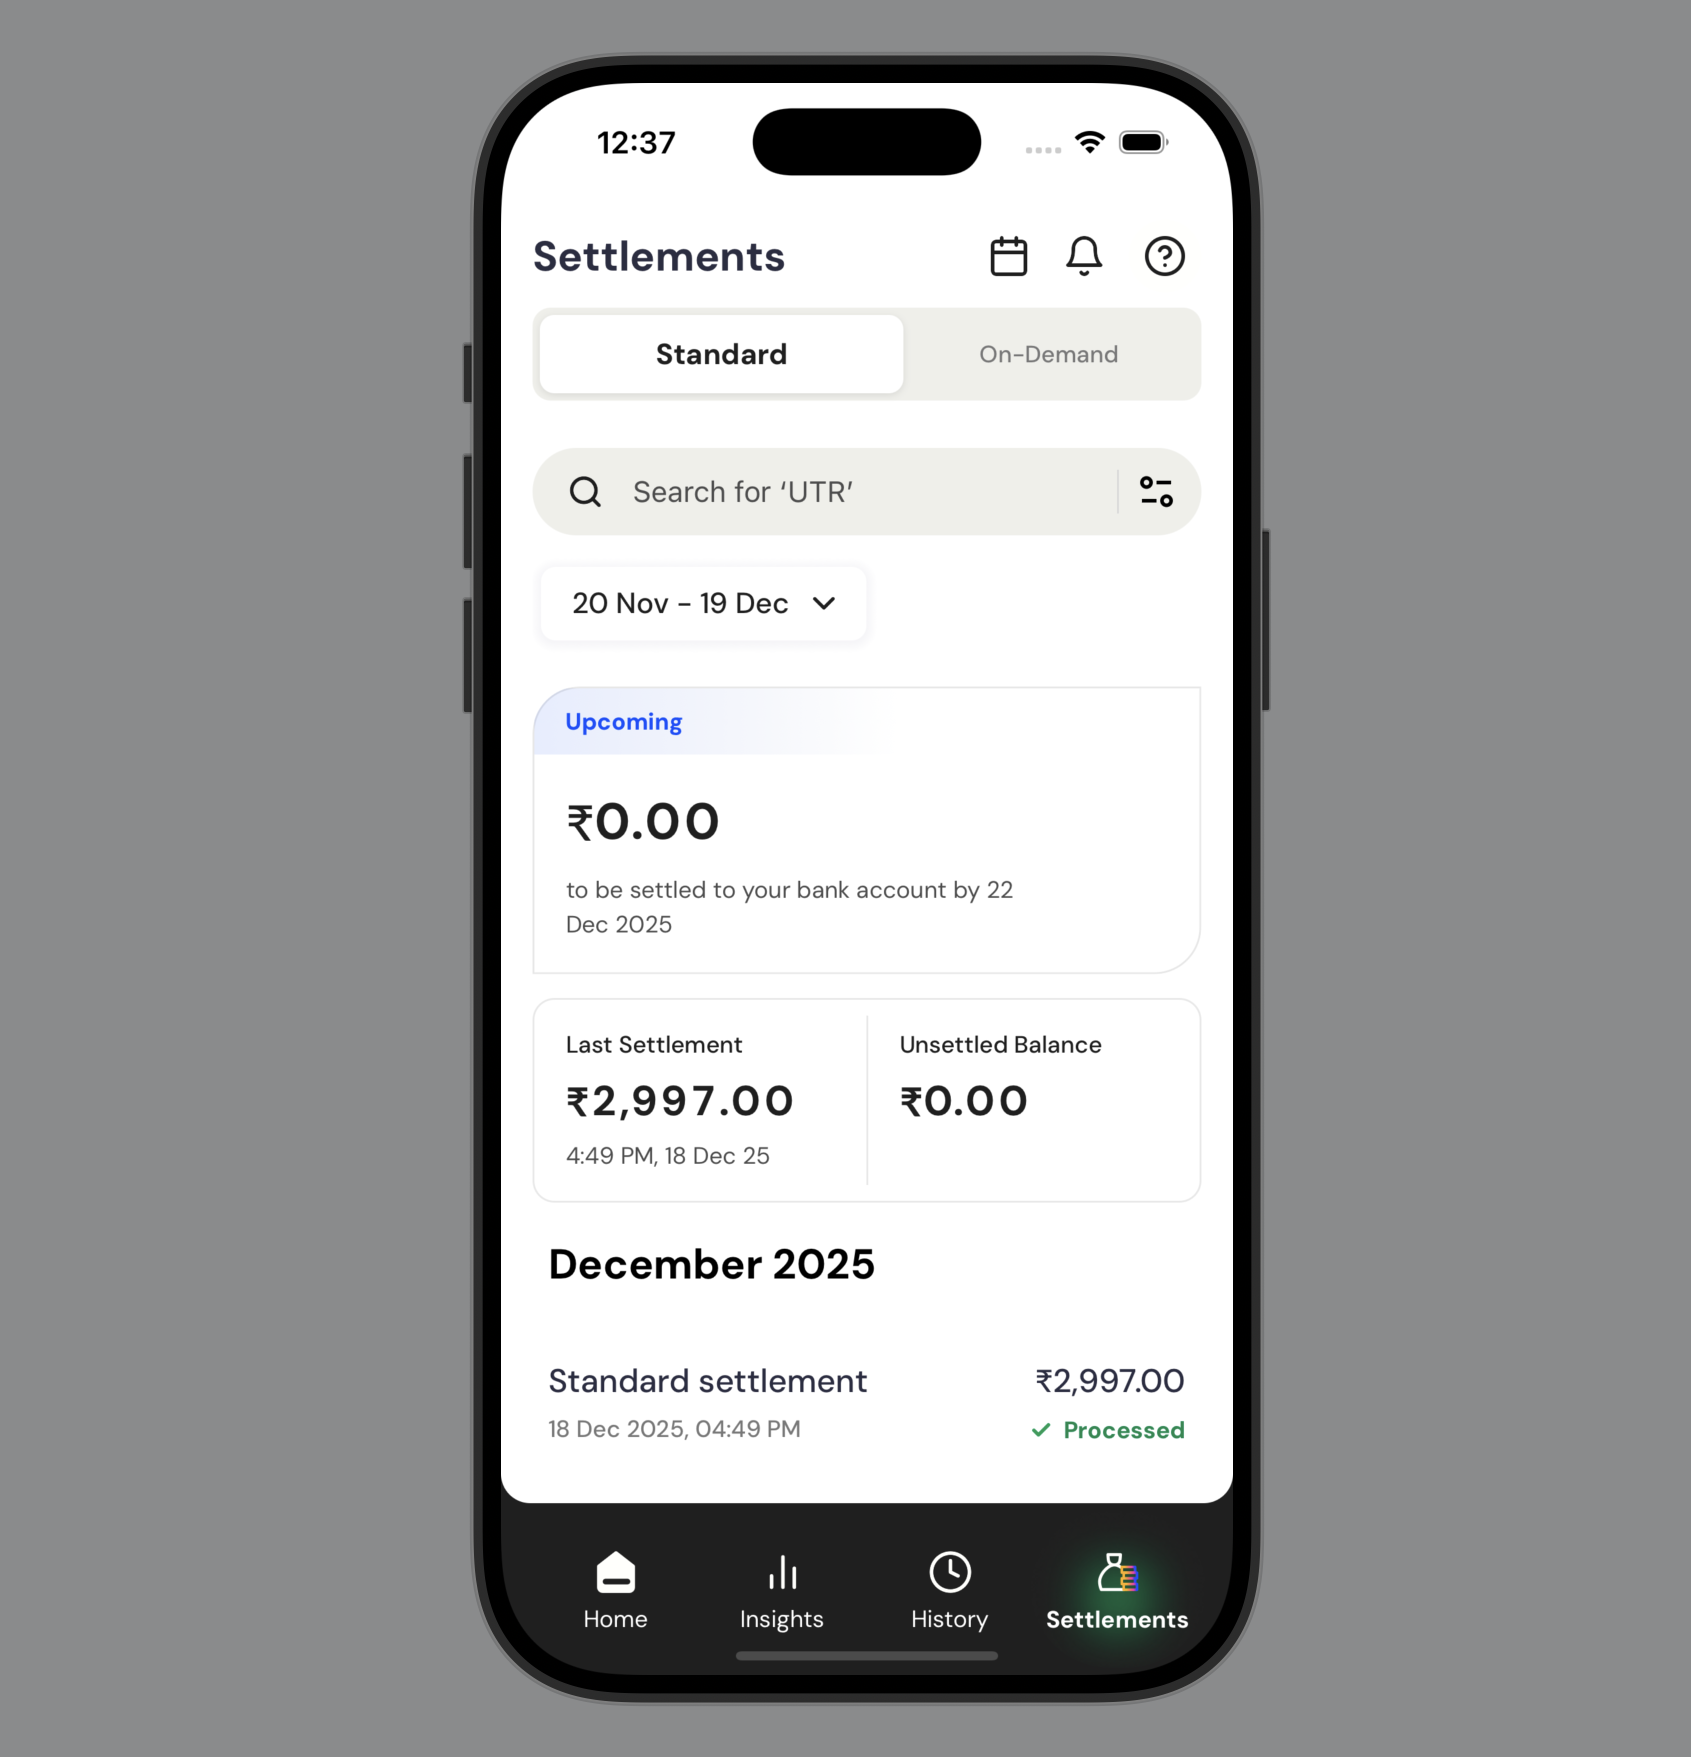
Track fund transfers, settlement schedules, and on-demand withdrawals
Settlement types
Choose the settlement method that best fits your cash flow needs:- Standard settlements
- On-demand settlements
Best for: Regular business operations with predictable cash flow needs.Automatic settlements processed according to your default settlement schedule. Funds are transferred to your bank account at regular intervals.Features:
- Automated processing
- Regular transfer schedule
- No daily limits
- Processed based on your business agreement
View settlement summary
The Settlements screen displays key information about your account balance and settlement status:- Pending settlement amount: The total amount to be settled to your bank account, including the expected settlement date.
- Last settlement: The amount and timestamp of your most recent completed settlement.
- Unsettled balance: The current balance available for settlement.
- Select the appropriate tab (Standard or On-Demand).
- In the search field, enter the UTR number. Results appear automatically as you type.
- In the upper-right corner, select the filter icon.
- Select one or more status options (Processed, Failed, or In Progress).
- Select Apply filters.
Withdraw funds on demand
Access your funds immediately within your available daily limits. The daily withdrawal limit shows the remaining amount available for on-demand settlements. This limit resets daily based on your account configuration. To withdraw funds on demand:- Select the On-Demand tab.
- Review your available balance and remaining daily limit.
- Select Settle Now.
- Follow the on-screen instructions to complete the withdrawal.
Additional features
The mobile dashboard provides navigation and account management features from the Home screen.Access notifications
To view notifications:- On the Home screen, select the bell icon in the upper-right corner.
- Review your notifications for transaction updates, settlement alerts, and account information.
Get help
Access support through the Cashfree Care support system. To open the support chat:- On the Home screen, select the help icon (?) in the upper-right corner.
- Browse suggested questions or enter your question in the text field.
Manage your profile
Access and update your account settings, security preferences, and app configurations through the Profile screen. To access your profile: On the Home screen, select the profile icon in the upper-left corner. The Profile screen provides the following options:
Change your password
To change your password:
- On the Profile screen, under Security, select Change Password.
- Follow the on-screen instructions to update your password.
- On the Profile screen, under Security, select the Biometric Authentication toggle.
- Follow the prompts to set up fingerprint (Android) or Face ID (iOS) authentication.
The biometric authentication option displays a fingerprint icon on Android devices and a Face ID icon on iOS devices.
- On the Profile screen, under Help & Support, select one of the following options:
- Chat with support: Open the Cashfree Care support system for instant help.
- Request a feature: Submit feature requests or suggestions.
- Your Account Manager: Contact your dedicated account manager.
Configure push notifications
Manage notification preferences to receive alerts for account activities. To configure push notifications:- On the Profile screen, under Settings, select Push Notifications.
- On the Manage Notifications screen, configure the following options:
- Transaction Success: Receive notifications for each successful payment.
- Settlement Updates: Receive alerts for settlements, upcoming holidays, and key updates.
- Select the toggle switch to enable or disable each notification type.
If notification permission is disabled on your device, you must enable it from your device settings to receive push notifications from the app.
Sign out
To sign out of your account:- On the Profile screen, scroll to the bottom of the screen.
- Select Log out.