

- Dashboard
- API
Use the Merchant Dashboard to add a single vendor via the Easy Split interface.To add a new vendor:Watch this video to learn how to add vendors via the Merchant Dashboard.
- Log in to the Merchant Dashboard.
- Go to Payment Gateway > Easy Split - Vendor > Add Vendor.
-
Enter the following details and select Next:
- Vendor ID: ID of the vendor.
- Phone number
- Email ID
- Vendor line of business: For available options, see Vendor LOB.
- Vendor business type: Choose Individual or Business Entity.
- Settlement cycle: Select a schedule option. For available options, see Available schedule options.
- Add vendor bank account details (account holder name, account number, and IFSC) or UPI VPA.
You can provide either the vendor bank account details or a UPI VPA. Do not provide both.
- Enable Dashboard Access to allow the vendor to access the Vendor Dashboard. For more information, see Vendor Dashboard overview. This step is optional.
- Select Verify Account Details to validate the beneficiary bank account or UPI VPA.
Verifying bank accounts and UPI VPA is chargeable. Make sure you have sufficient balance before proceeding, or continue without verification.
- Provide KYC documents according to vendor type (Individual or Business Entity). For required documents and limits, see the KYC document requirement section.
- Select Add Vendor Details to complete onboarding. The new vendor appears in Easy Split - Vendor.
Add multiple vendors (batch upload)
Prepare a batch file using the sample CSV template. Ensure all required columns are present and formatted correctly.To add multiple vendors:- Log in to the Merchant Dashboard.
- Go to Payment Gateway > Easy Split - Vendor.
- Select Upload File and choose the prepared batch file.
- Select Upload to start processing. The system validates the file and processes valid rows.
- After processing completes, download the error log (if any) and fix rows that failed validation.
- Reupload the corrected file to add the remaining vendors.
- File size limit: 8 MB. Maximum records per upload: 50.
- The upload fails if the file does not match the required format. Always download and review the error log, fix issues, and reupload only the failed rows.
Available schedule options
Use schedule option 8, 9, 14, or 17 to schedule instant settlements to your vendor account.Schedule options
Schedule options
T+x*: Settlement cycle is subject to bank approval and can vary based on transaction type, business category/model, risk parameters, and other factors.
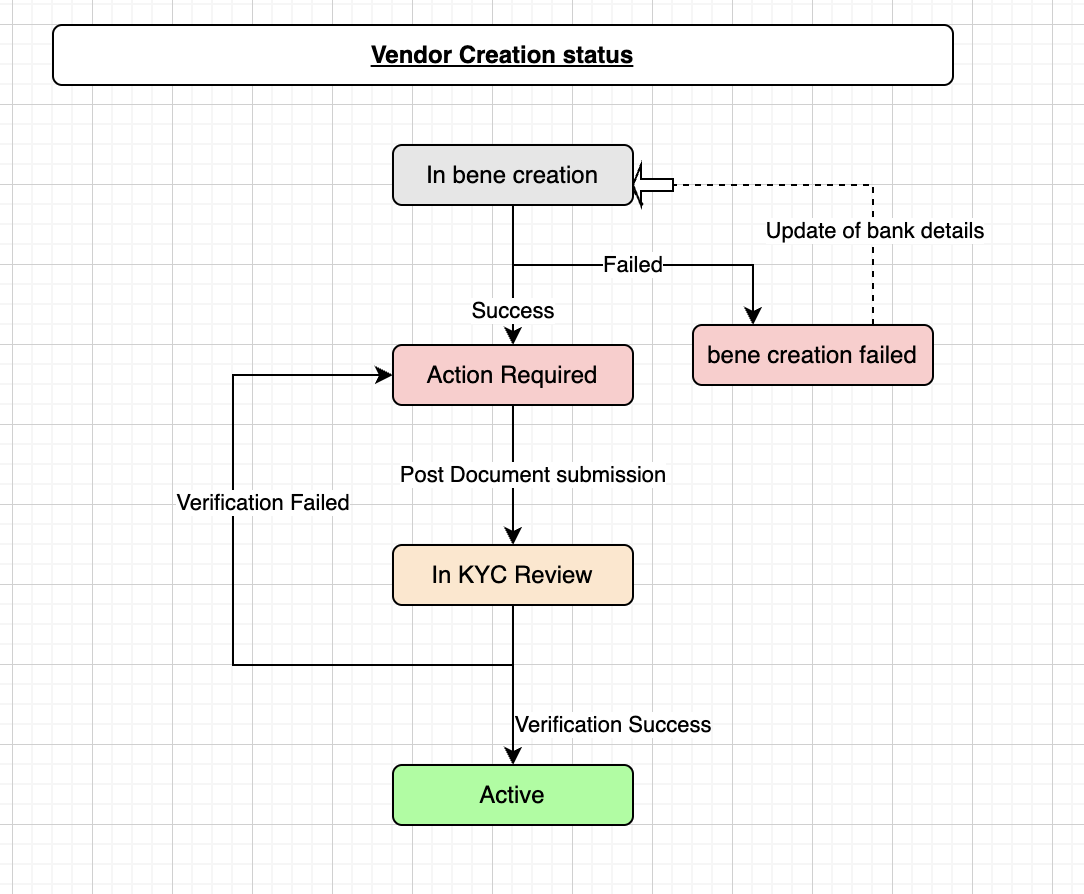
Vendor status workflow
When you onboard a vendor from the dashboard or use the APIs, the vendor goes through various states. The following table describes the vendor statuses during the onboarding process.
The image below shows the vendor onboarding flow.
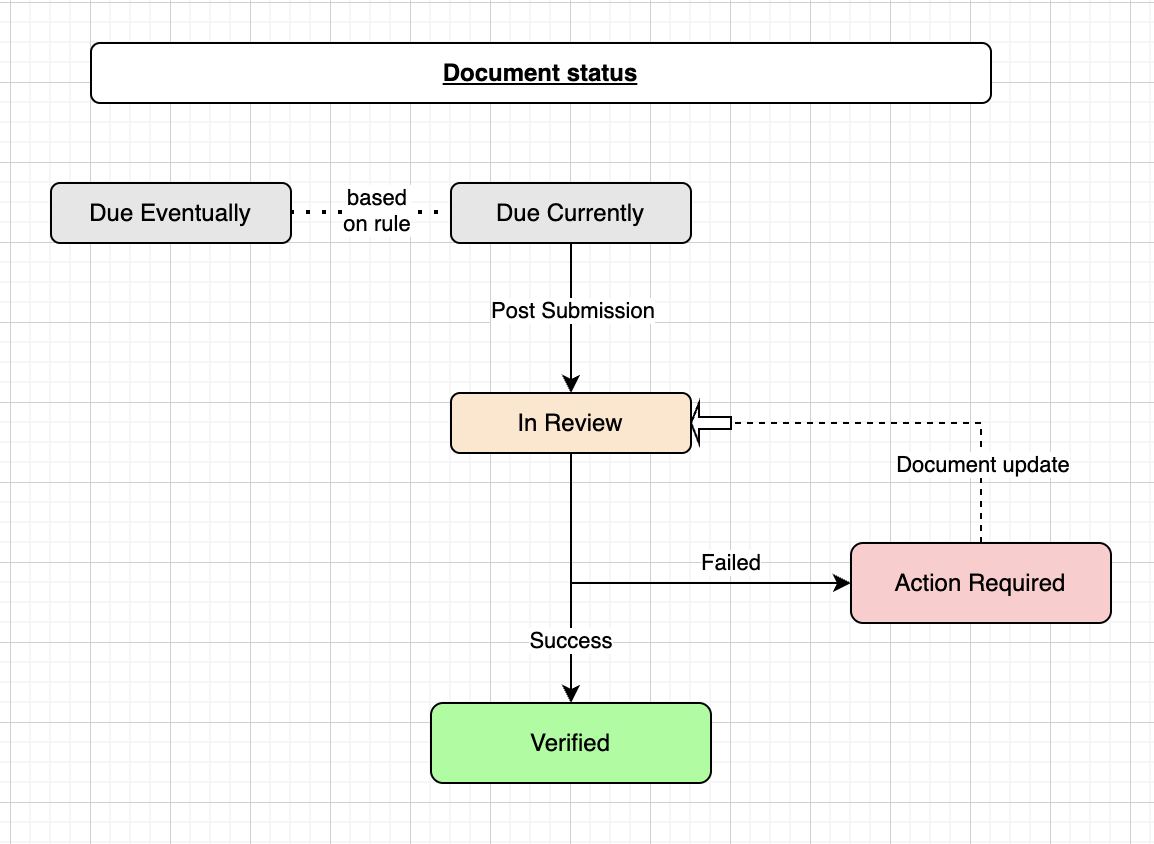
Document status workflow
The following table describes the states a document goes through during the verification process.
The image below shows the document status workflow.
KYC document requirement
The following table lists the required documents based on applicable limits. Requirements vary by merchant type and vendor type.List of vendor line of business (LOB)
The following list contains all supported vendor lines of business (LOB).Vendor LOB
Vendor LOB
Vendor LOB specific documents
NBFC
NBFC
If the vendor type is NBFC, the following additional documents are required:
- CIN
- NBFC and LSP Agreement
- NBFC Certificate
- NBFC domain confirmation email on Cashfree partnership